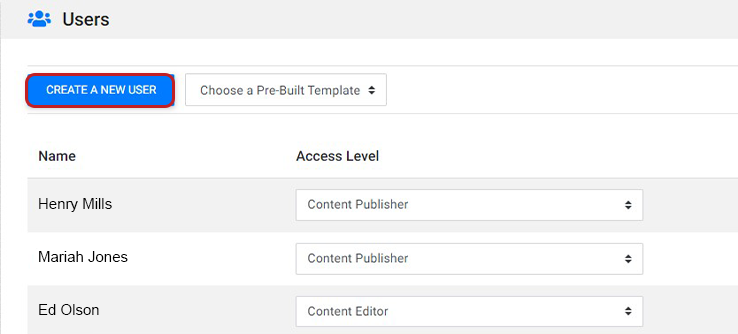
After logging into the CMS, you may need to create new users that can access your site. Access the User Manager to get started.
This article describes the process of creating a new user manually. You can also create a new user from an existing template or by copying another user.
After accessing the User Manager, click the button on the top lefthand side.
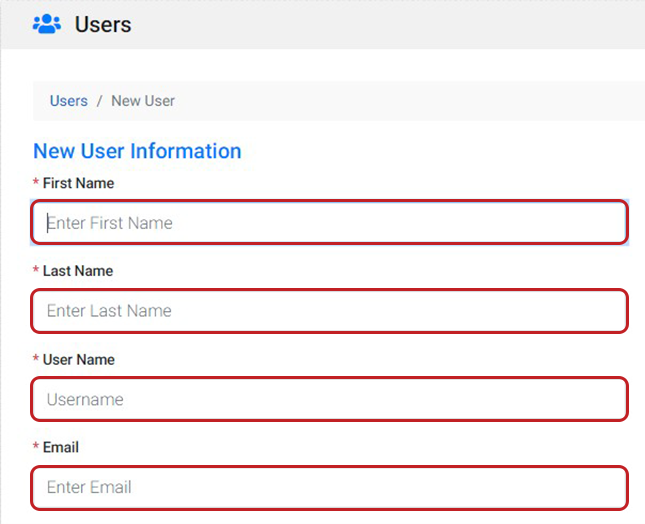
You'll be taken to a new user form where you can fill out the user's name, email, username, access level, and website permissions.
User Information
Enter the new user's
- first and last name
- a username they can use to log in
- an email address the user has access to
This is so you can identify the user in your User Manager and they can log in and receive notifications.
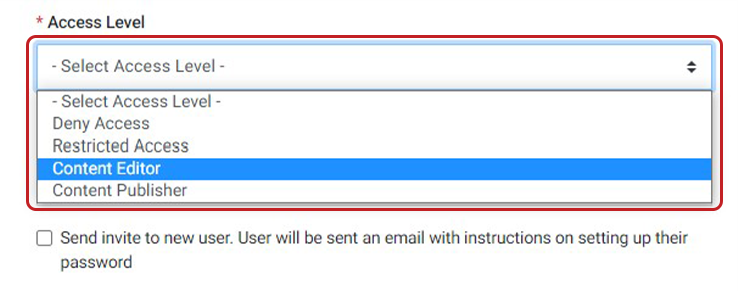
Access Level
When creating a user, you can determine how much access they have to your website. You can choose three levels of access:
- Content Publisher - these users can edit and publish changes to the live site. They also have access to the System and Plugins tabs in your CMS.
- Content Editor - these users can edit the website, but cannot publish changes to the live site. They must request changes to be reviewed by a Content Publisher in order for changes to be published. They do not have access to the System and Plugins tabs in your CMS.
- Restricted and Deny Access - these users have limited or no access to your site's CMS.
Select the appropriate access level for the new user you're creating.
Permissions
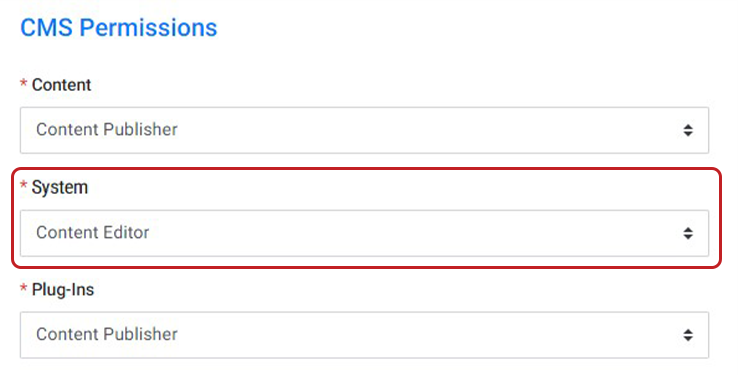
Once you've selected an access level, you'll see the Permission fields autopopulate. You can customize these fields for individual users. The highest permission they can be assigned is limited to the access level you selected in the previous step.
CMS Permissions
CMS Permissions control access to the tools in the CMS dashboard. You can adjust what tools users have access to.
For example, you may wish to restrict a Publisher User from accessing System Tools. In that scenario, you would downgrade their System Permission to Editor.
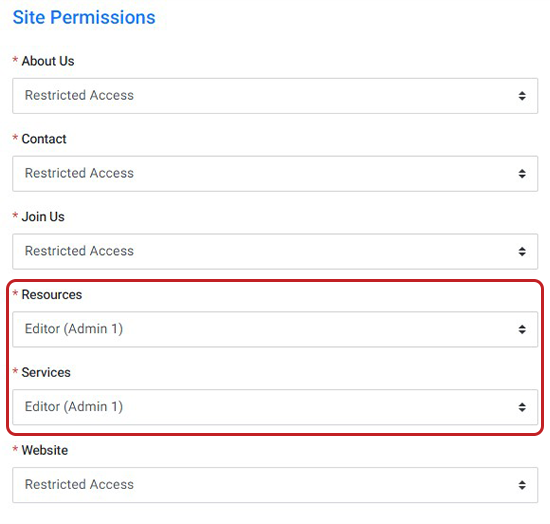
Site Permissions
Site Permissions control access to the Apps of your site. Apps ususally correspond to the main areas of your website as defined by the site navigation. Larger sites will have multiple apps while smaller sites may have only one ("Website").
In the visual example shown here, our site has multiple sections (About Us, Contact, etc.). Say we have an editor that works solely on the Services and Resources sections of the site. We can give them "Editor (Admin 1)" access to these two sections and set them to Restricted for the others. This ensures the editor only works on the pages they have been assigned.
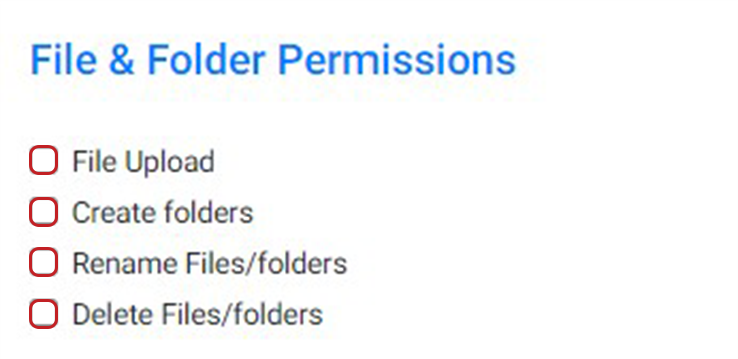
File and Folder Permissions
File & Folder Permissions refer to how a user can manipulate documents on your website. You can choose to let them:
- Upload files
- Create folders
- Rename files/folders
- Delete files/folders
Typically, at a minimum, all users should have File Upload and Create Folder permissions.
Presets & Notifications
Presets
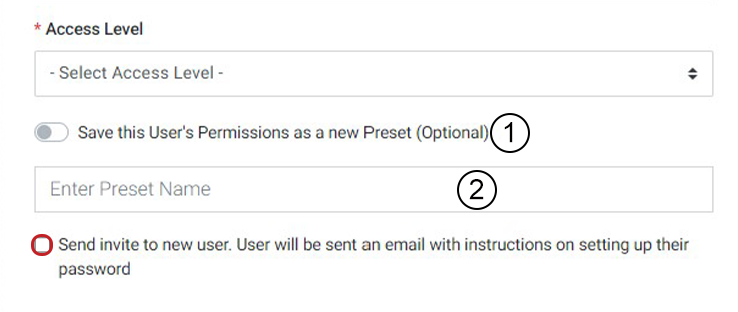
After determining this user's permissions, you may want to save it as a preset for future users. This is entirely optional.
- Select "Save this User's Permissions" below the Access Level.
- Give the Preset a name.
Once a preset is created based on a user, that preset is linked to the original user. If you were to delete the original user, the template would also be deleted.
Notify the User
To send an invite to the user, check this box. This will send an instruction email to the address entered earlier.
Once you've completed the user form, click submit to save your changes. The new user will appear in your User Manager.