After you’ve uploaded photos to an album, you’ll also be able to edit the photos using the Image Editor.
To access it, you’ll first need to navigate to the Photo Gallery Tool in the Plug-Ins Manager. After selecting the Photo Gallery tool, all of your available albums will list on the screen. From there:
Find the album you’d like to work with and select the View Photos icon from the toolbar next to it.
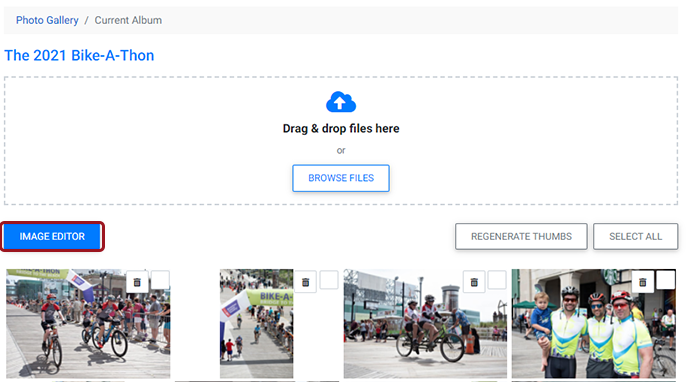
The album will open, showing all photos it contains:
Tip: You can drag and drop photos within the Photo Album to change the order in which they will display on your live site.
To access the image editor, simply:
- Select the blue Image Editor button
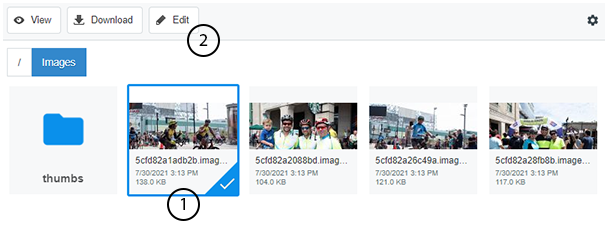
The album will now appear in a new window. To edit any photo:
- Select the photo you’d like to work with
- Select Edit
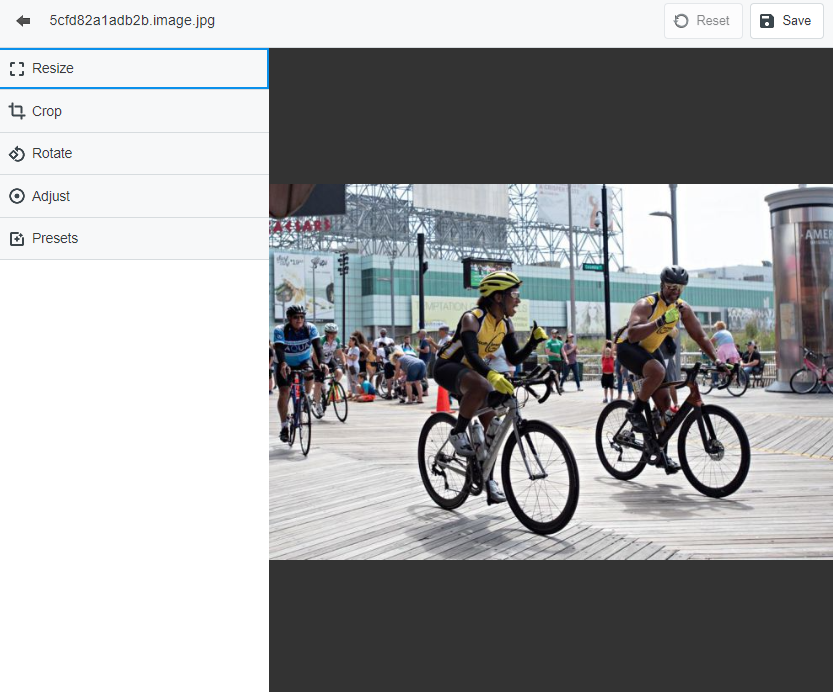
The image will now appear with edit features next to it. To access any edit feature, click to expand.
Now you can resize, crop and rotate the image or adjust coloring. You can even add photo filters using the Presets function.
When you are finished editing, select Save.
After making changes within the Image Editor select “Regenerate Thumbs” to send the changes to your live site.


