Once a form is created by submitting a new name, there are several features you can assign to manage how the form will work on your site. Let’s take a look at those features now:
-
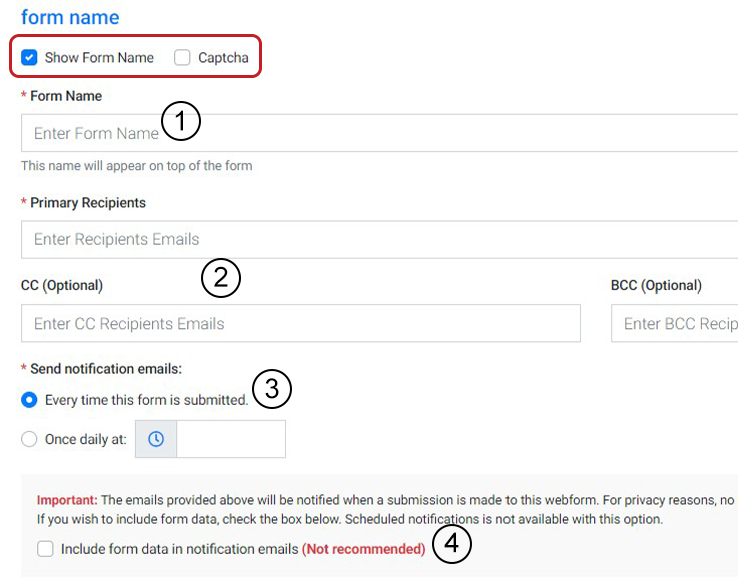
Show Form Name: this feature is selected by default. It will allow the form name you entered to be visible on your website. To hide the form name, simply uncheck this option.
-
Captcha: selecting this feature adds an additional level of authentication in the form of a simple math problem that the user must complete before they submit the form.
Within the form details window, you can also:
- Update the form name, if needed.
- Enter email addresses for the primary recipient as well as any email addresses that should be CC’d or Bcc’d when the form is submitted from your website.
- Set when notification emails are sent about form submissions. You can either receive an email every time the form is submitted or set a daily time to be notified of entries.
- Set whether form data is included in the email. (For privacy reasons, this is not recommended. See Form Data Retrieval and Privacy for more information.)
After selecting the above options, update, add, or remove the greeting and confirmation messages. These features apply to the form as follows:
- Greeting messages will appear at the top of the form.
- Confirmation messages are revealed after a site visitor successfully submits a form.

Then,
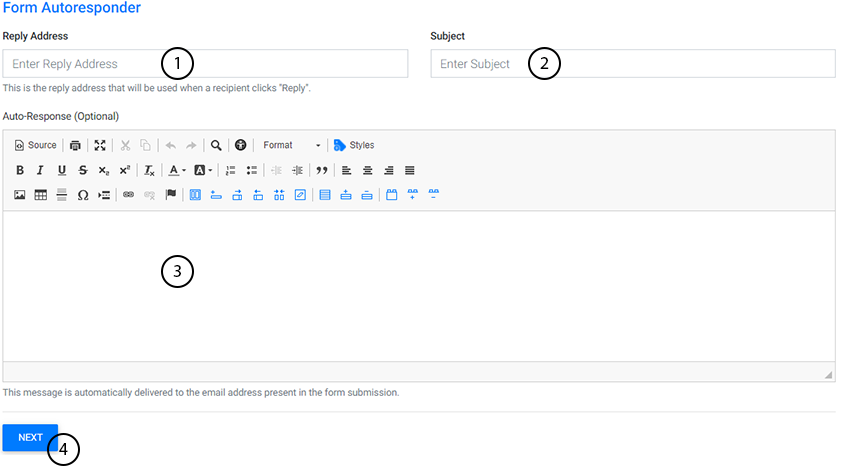
- Set Reply Addresses if you’d like to have an autoresponder on your form. This is the email address that will be used if someone attempts to reply to the autoresponder they receive after submitting a form.
- Enter the desired subject line.
- Enter the email message (optional).
- Select Next to assign form fields.
Watch Related Video Tutorials