With the new CMS 7 Form Builder, you can easily create simple or multi-step forms using a drag and drop feature.
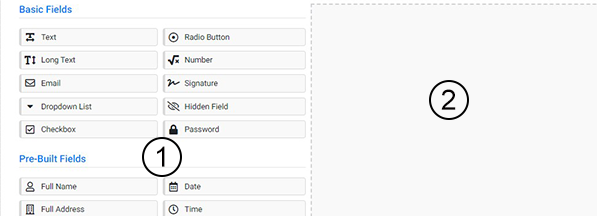
After creating a new form and hitting "Next" at the bottom, a new page will open with the drag and drop editor.
To design your form:
- Select a field from the left.
- Drag it into the preview block on the right.
- Click "Save and Exit" to submit your edits.
If you would like to preview the form before saving, select "Preview Form" at the top.
After saving, you can make further changes by going to the Form Builder menu and editing the existing form.


Form fields are divided into three categories: Basic, Pre-Built, and Section.
Basic Fields
These fields allow site visitors to enter information and answer questions you set.
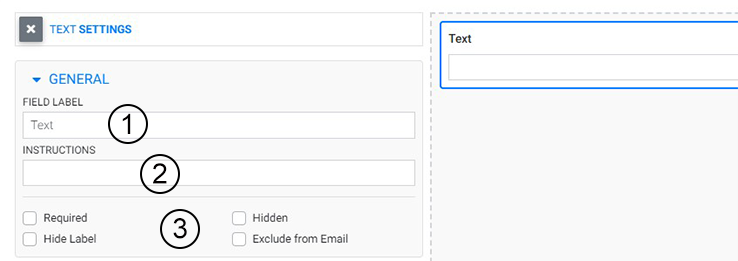
After adding the field you want, click the field you added. A new view will appear showing you what changes can be made. All fields have the same general settings where you can:
- Create a label.
- Create instructions.
- Define how the field appears. Check all that apply.

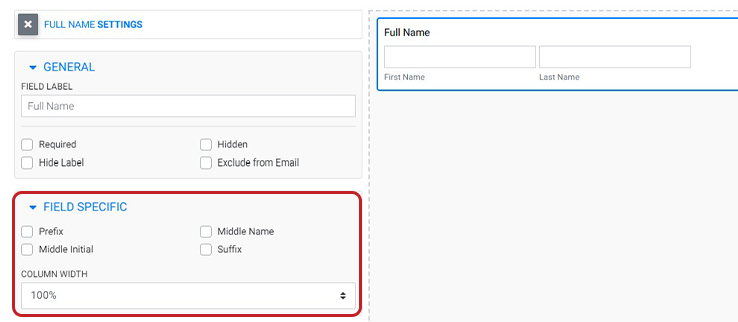
The Field Specific options will change depending on the feature.
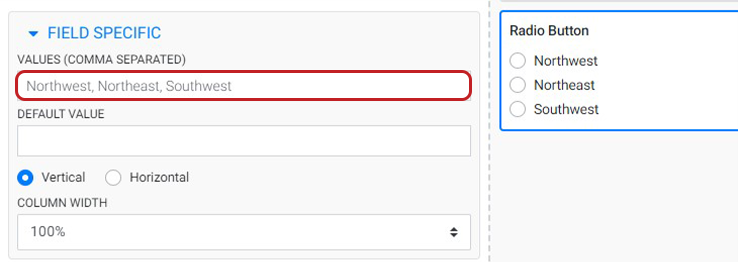
For example, the Radio Button, Dropdown, and Checkbox features will have a Field Specific option labeled "Values." This is how you define what options site visitors have to choose from in your form.
To create your menu options, type words/phrases into the field. Separate each option with a comma in order to create a new point.

Pre-Built Fields
These fields are pre-designed to collect specific information.
You can customize these features to further narrow or generalize the information you want by clicking on the block and accessing the field settings.

Tip: after adding fields and sections to your form, you can reorder them by clicking into the specific area to highlight it, selecting “Move” in the top right of the highlighted area and dragging and dropping to the desired place.
BONUS TIP: Select edit, then configure the Column width to create two and three column layouts.
Watch Related Video Tutorials
