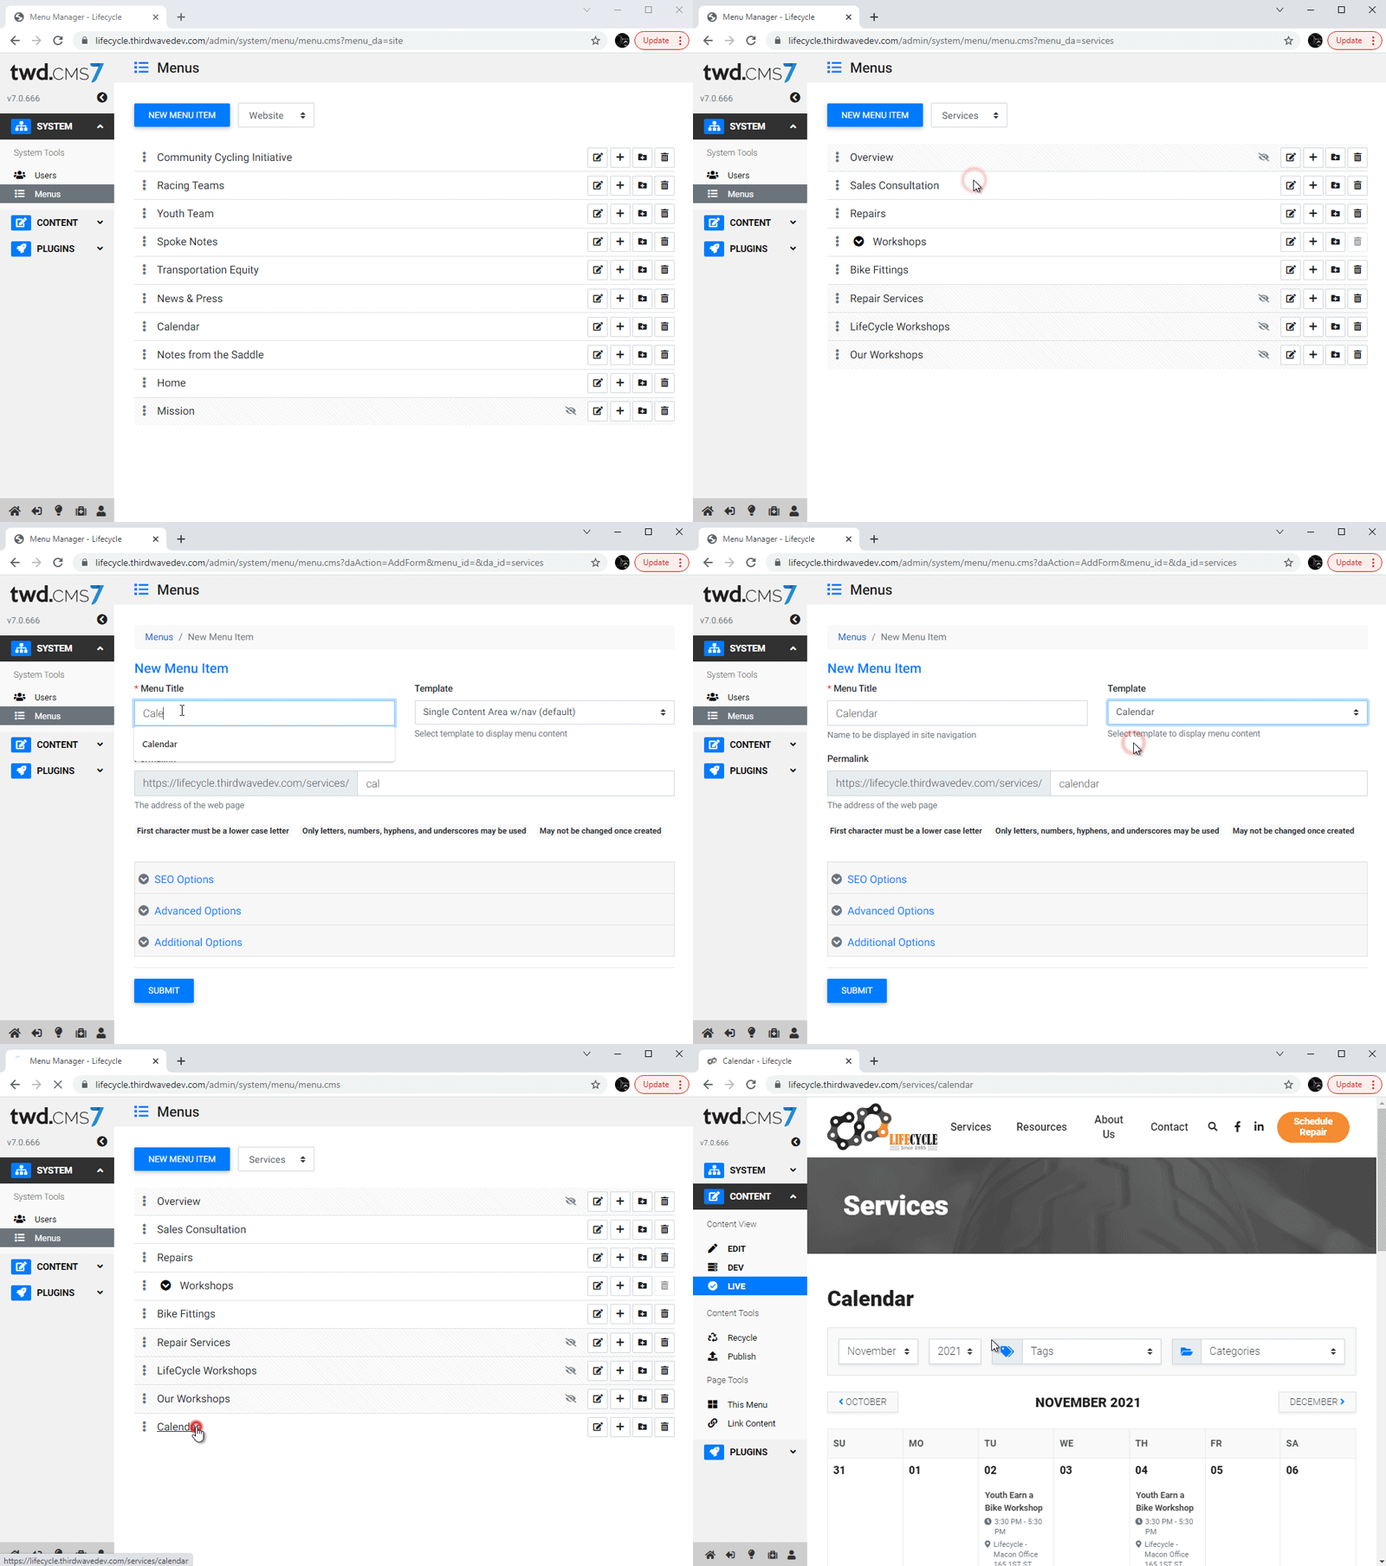
Once you’ve created a calendar, you can assign it to a page of your website.
Start by:
- Select the Menu Manager contained in the CMS Dashboard. Click on the system tab to expand it.
- Select Menus
Once “Menus” is selected, you’ll see a new view with a drop-down box indicating the active “application."
Applications correspond to Main Menu items. On some websites, the “Website” application may contain all pages on the site. On larger and complex websites, you may have to change the application based on which section of the website you’d like to modify.
To add a calendar page:
- Select the application where the calendar will live. (e.g. Services)
- Click the "New Menu Item" button to create a new page where you want your calendar to display.
- Give this new page a Title
- From the Template dropdown menu, select the Calendar template.
- Click "Submit"
- After clicking submit you will be returned to the menu manager list view. From here you can click on the new Calendar page you created and view your calendar.

Watch Related Video Tutorial: Calendar Tool Page Setup


