To add links to a page, highlight the text or click on image you’d like to hyperlink within the content editor, and click the link icon. If you are linking text, the highlighted text will appear in the “Display Text” box in the Link Window. This window also includes a Link Type dropdown that allows you to specify the type of link you want to create (a web page URL, email, or anchor).
Expand the accordions below for detailed instruction on each link type.
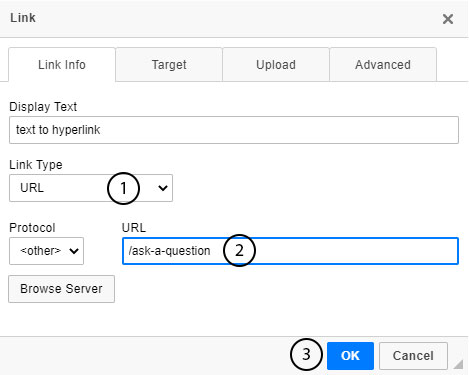
Linking to a page within your current site:
- Make sure the Link Type drop down is set to URL.
- If the target page is internal – meaning that it is located within the same website – you do not need to specify the entire URL. Instead, start by entering a forward slash (/) followed by the page you’re linking to. For example: (/ask-a-question.cms).
- Select “OK” to insert the hyperlink.
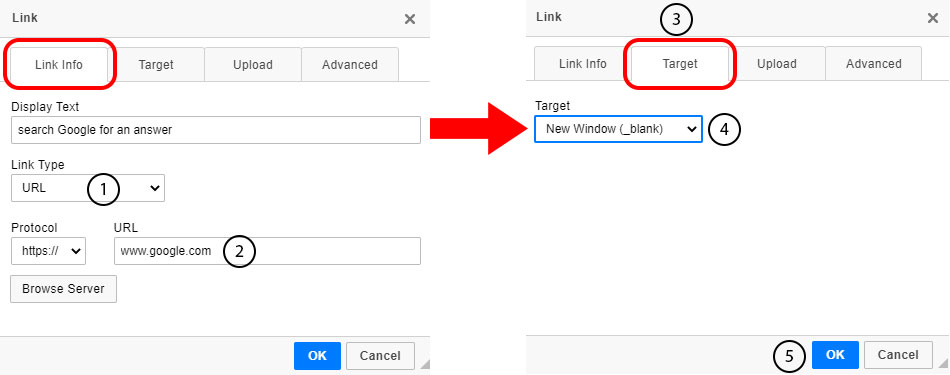
Linking to a page on another website:
- Make sure the Link Type drop down is set to URL.
- Because the target page is external – meaning that it is located on a different website – you will need to specify the entire URL. (ex: www.google.com)
- Additionally, when linking to an external website, it's good practice to make the link open in a new window. This action is managed within the target tab.
- Once on the target tab, set the target to New Window (_blank) in the drop down.
- Select “OK” to insert the hyperlink
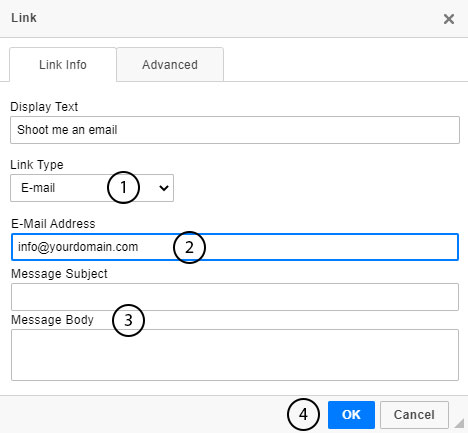
Linking to an Email Address
If you’d like to add a link to an email address (ex: info@example.com) you can do so by highlighting the text to be linked and selecting the link icon.
- In the “Link Type” drop-down, select “E-mail”
- Enter the recipient’s email address.
- Add any subject or message you’d like included in the email (optional).
- Select “OK”
Tip: When you test the link, your default mail client (such as Microsoft Outlook) will open automatically, and the Subject and Body you entered within the CMS will auto-fill according to the information you provided.
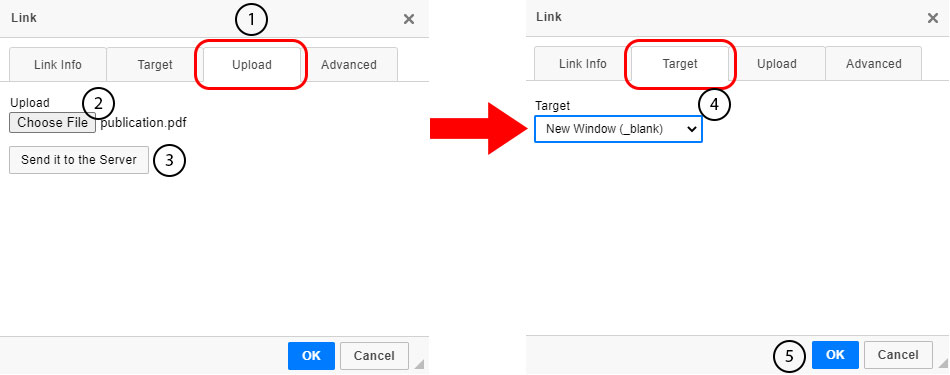
Linking to a file
Adding a link to a PDF or Word doc is just as easy as adding other links! As with other types of links, you’ll start by selecting the text that you’d like to link to and clicking the link icon. In the window that opens, leave the Link Type dropdown set to URL and follow the steps below:
- Select the Upload tab.
- Click on Choose File to browse your computer for the desired file. Select the file you want and click Open to load it.
- Back in the Upload tab, click Send it to the Server.” Once this is completed, you will be returned to the Link Info tab where you will see the URL for the file that you uploaded.
- Click the Target tab. Once on the Target tab, set the target to New Window (_blank) in the drop down to designate this file to open in a new tab when the link on your site is clicked.
- Select OK
Tip: Once the file’s URL has been created, that URL can be used to link to the document elsewhere in the site without re-uploading it.
Linking to Anchor Text
Adding anchor links allows you to link to other specific areas of a page, either on the same page or a different page of your site. This tool is especially helpful on pages containing a large amount of content. Anchoring allows your website visitor to quickly jump to the content area they are interested in.
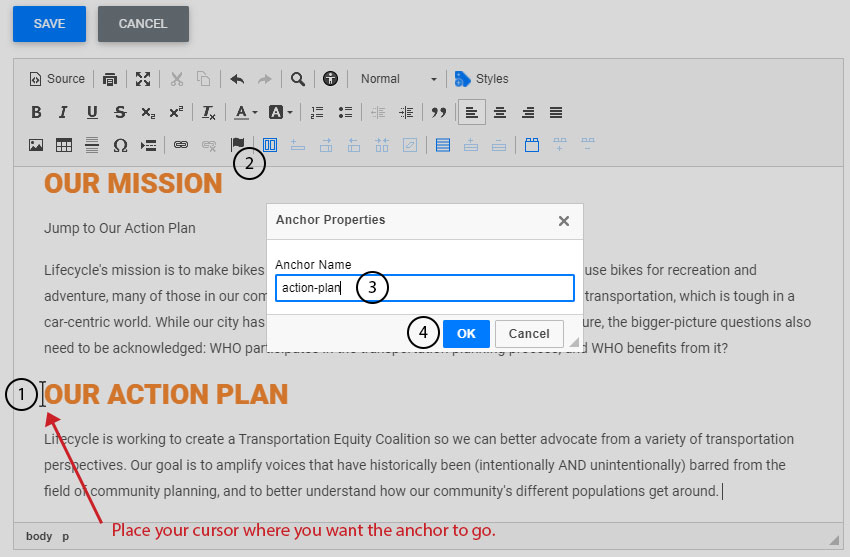
To link to an anchor, you’ll first need to create the anchor. To do so:
- Position the cursor in front of the text you’d like to anchor to.
- Select the anchor icon (resembling a flag) from the content editor options. A dialog box will open.
- Enter the name you’d like to use for the anchor
- Select OK
The selected text now appears with the anchor icon in front of it:
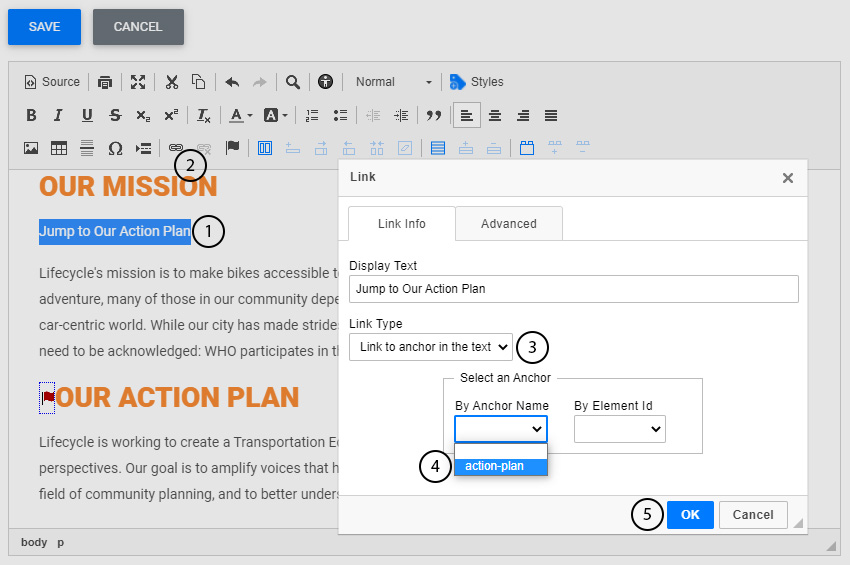
Next, you’ll create a link to the anchor you just inserted. To do this you’ll:
- Select the text area you’d like to link to the anchor
- Select the link icon from the content editor toolbar
- Select “Link to anchor in text” from the link type drop down
- Select the name of the appropriate anchor from the anchor name drop down
- Select OK
Watch the video below for more indepth instruction on adding links

