Adding a Content Area
The most common type of content area, is the Content Block. To add a new content block, navigate to the page you’d like to add content to and:
- In the CMS dashboard, select Content and enter Edit Mode.
- On the page, click the Content Menu
- From the contextual menu that appears, select Add New Content Block.
Adding Content
Once you’ve added a new content block, a second contextual menu appears. These are your Content Block Options.
Click the Options menus then click the blue edit button to open the editor.
Other Content Block Options
The CMS 7 content block options is a simplified and easy-to-use area that allows you to make changes to your site with a few clicks.
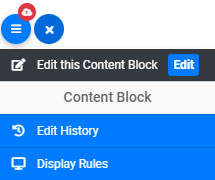

Edit History displays a history of who has modified content within that content area

Display Rules gives you the ability to modify the access level or specify a begin/end date in which the content should display.

The Promote Content icon appears with the Content Menu and alerts you that there is newly added content on the page that has not yet been promoted live.
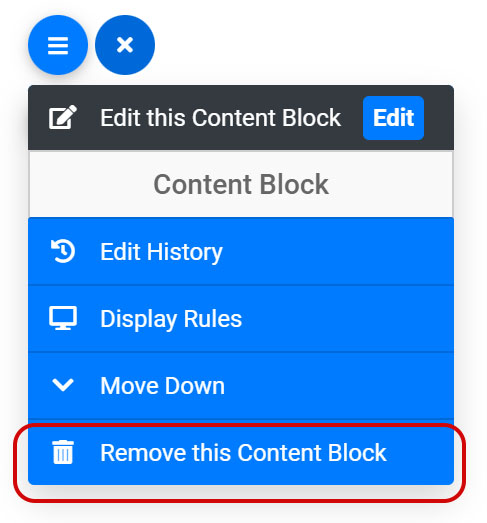
Removing a Content Block
To remove a content block, click on the Content Options Menu associated with the block you want to remove. Then select the "Remove this Content Block" option.
Note: You cannot remove a page's last content block.
To Access the Content Editor:
1. .JPG) Click the pencil icon from the Content Block options.
Click the pencil icon from the Content Block options.
2. Select the first option to "Edit this Content Block” and a word processing like interface will open (as shown below).
Adding Text to a Content Area
To add text to a page, simply click within the Editor and begin typing.
1. To paste from an outside source, such as text pulled from another website, you can use the keyboard short-cut CTRL+V or the recommended “Paste as Plain Text” shortcut CTRL + SHIFT + V.
2. The text will appear within the Content Editor:
3. Click Save to save to Edit Mode, content will not be visible on live site until Promotion.

Watch the video below for more indepth instruction on editing content areas and adding text.
Related
- A.I. Content Assistant 2FA AI Assistant Artificial Intelligence Editing Editor Generative Content Generative Text SEO Search Engine Optimization
- Accessing Edit View Dev Hyperlinks Images Live Modes
- Accessing the Menu Manager Menus Pages Subpages System
- Adding Tabbed Navigation Accordions Content Tabs icons