Adding images is a great way to break up text and include visual content for your audience. To add an image to a page, first move your mouse cursor to the area you’d like to add an image to and click on the Image icon.
To add a new image to the server, click on the image icon and then:
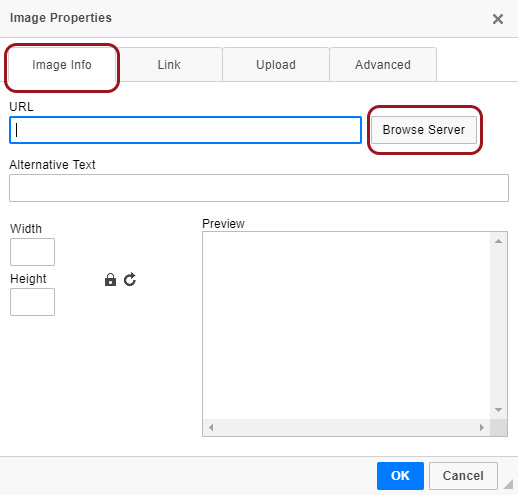
Within the image dialog box, on the Image Info tab, select “Browse Server”. This will open your site's file browser window.
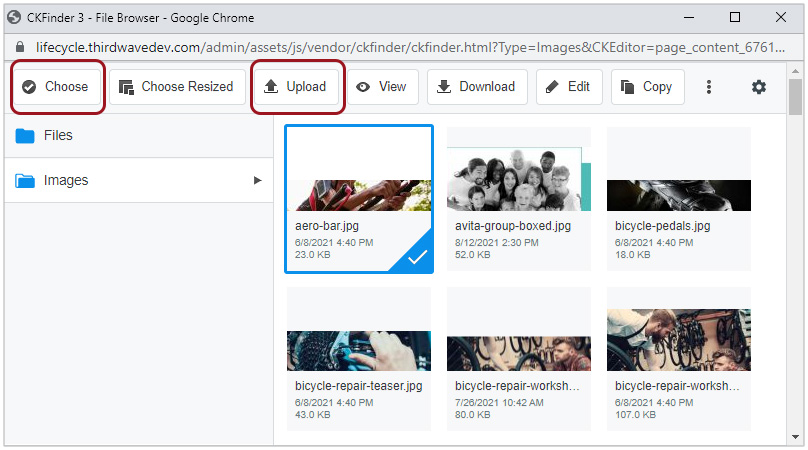
To add an image that has already been uploaded to the server, highlight the image and click the choose button at the top of the file browser window.
If you want to add a new image from your computer,
Click the “Upload” button
Select the image you’d like to add and click open. This will upoad the image to your image library.
Click the Choose button to insert the uploaded image into your page
The image will now appear as a preview on the “Image Info” tab
On the Image Info tab, add alternative text that describes the image. This step is optional but is helpful for allowing users with screen readers to still understand what images are on your site.
If present, remove any values included in the width and height fields. This will allow the image to adjust to fit any size browser window.
Click “OK” to view your image in the content area

Tip: You can also paste an image directly into a content area. If the image lives on your computer, pasting into the content area will send the image to the server. We do not recommend pasting images that live on other websites. Note that once you’ve pasted an image into the editor, you’ll be able to follow steps above to set image info.
Watch Related Video Tutorial: Content Editor Basics