Slideshows are an interactive tool you can use to add images and motion to your site. After creating a new slideshow, the next step is to add slides.
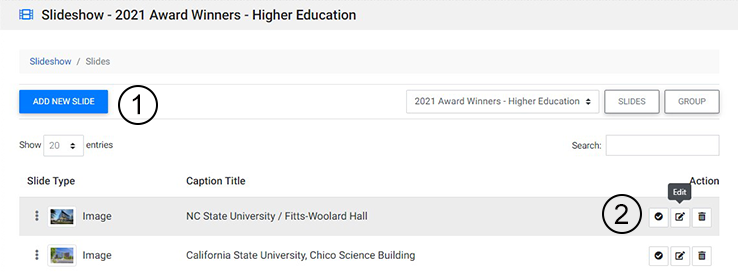
There are two different ways to access the Slide Detail View. Start by navigating to the Manage Slides menu. Once there, you can either:
- Add a new slide
- Edit an existing slide by clicking the Edit button of the slide you wish to edit.

Once inside the Slide Detail View, you can upload an image or video by following the steps below.
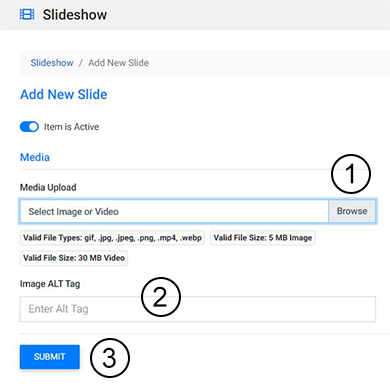
Upload an Image
- Select "Browse" to open a dialog box and browse files on your computer. Once you've found the image you want to use, hit enter to load it and return to the Slide Detail View page.
- Create an Image Alt Tag for your image by typing in the field. This step is optional but is important meet accessibility standards and improve your visitors' experience.
- Click "Submit" to save your changes.

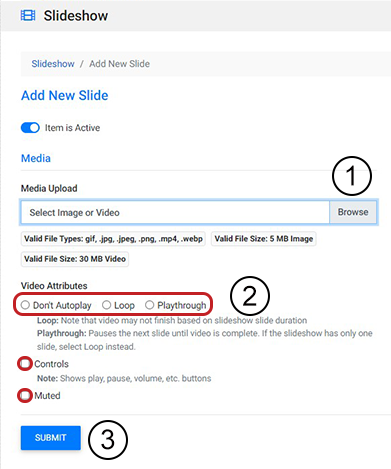
Upload a Video
- Select "Browse" to open a dialog box and browse files on your computer. Once you've found the video you want to use, hit enter to load it and return to the Slide Detail View page.
- Under Video Attributes:
- Select either "Don't Autoplay," "Loop," or "Playthrough" to determine how the video plays in the slideshow.
- If you want controls to appear on the video, check "Controls."
- If your video includes an audio track and you want it muted when the page loads (recommended), check "Muted."
- Click "Submit" to save your changes.

If you have trouble uploading an image or video, double-check that your file matches the valid file types and sizes detailed below the Media Upload field.

Other Slide Features
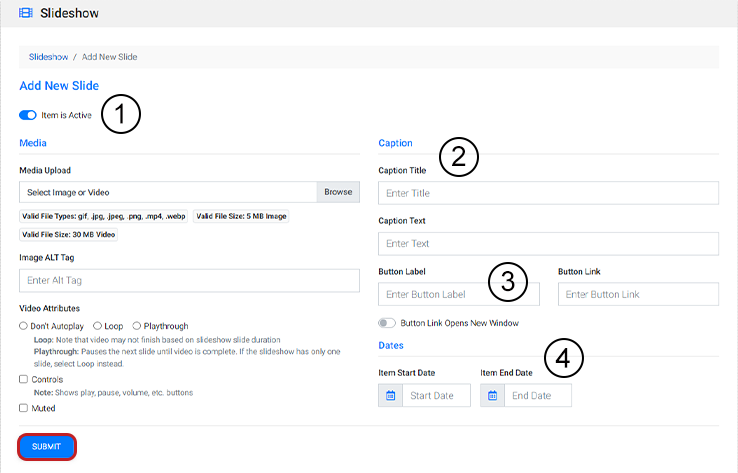
In addition to adding media, you can customize other aspects of the slide. Within this view, you can:
- Toggle the active state of your slide to determine if it is visible in the slideshow or not.
- Add a caption.
- Add a button.
- Add start and end dates.
Once you are satisfied with your slide, select "Submit" to save all of your changes.

Watch Related Video Tutorial: Slideshow Tool Basics
